|
Code Roar Reference Manual: A Quick Tutorial |
Often when working on any project it is desirable to have quick access to many different directories. Code Roar provides two quick access methods to navigate between directories:
Virtual drives
Shortcut locations
The file navigator in Code Roar works using virtual drives. A virtual drive is a drive that works similar to normally mounted drives in your operating system except that the location may be defined by the user. Therefore you can create a virtual drive that points to a location on your network or even have drives that reference multiple locations on your C drive. You simply map the directories as you desire.
In this example the File navigation panel will be used to create a virtual drive:
If the file navigation panel on the left hand side of the main screen is not visible enable it by selecting checking Left side panel in the Window menu.
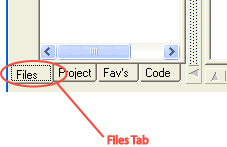
Select the tab titled "Files" from the list of tabs in the navigation panel to display the File navigation panel.

In the virtual drive drop-down at the top of the tab use the directory selector drop-down button to select one of the un-used virtual drives.

Select one of the un-used drives that have not currently been mapped from the list and click the browse button to map a new drive location.

The user can now use the virtual drive in the file browser exactly as you would any of the built-in drives.
HDL Workshop also introduces a concept called pinpoint locations. Pinpoint locations are buttons in the file browser that may be mapped to any location accessible by the file browser. For more information on pinpoint locations refer to DEBUG BRAD: Insert Link Here.
In this example the File Navigation Panel will be used to create an new pinpoint location:
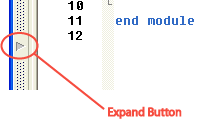
If the navigation panel on the left hand side of the main screen is collapsed, expand it by clicking on the Expand Button in the collapsible toolbar.

Select the tab titled "Files" from the list of tabs in the navigation panel to display the File Navigator.

Use the file browser to navigate to the directory that you want to remember using a pinpoint location.
Right click on the directory that you wish to bookmark and select "Set Current Directory as Pinpoint" and choose a pinpoint to set.
or
Right click on the pinpoint icon and select "Set Current Directory as Pinpoint X" where X is the number associated with the pinpoint icon.
The user can now left click on the pinpoint icon to navigate to the location anytime HDL Workshop is started.