|
Code Roar Reference Manual: Dialogs |
|
|
Code Roar Reference Manual: Dialogs |
|
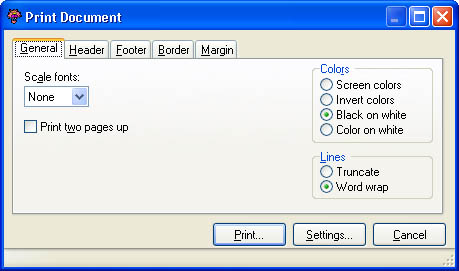
The Print Document dialog is displayed when the user chooses to print the current document. This dialog allows the user to customize the way that a document will be printed on screen.
It is divided into five tabs:
|
Tab |
Description |
|
Controls general options such as the magnification and output coloring. |
|
|
Allows the user to specify the contents of the header attached to each page of the printed output. |
|
|
Allows the user to specify the contents of the footer attached to each page of the printed output. |
|
|
Options for creating a border around the printed output. |
|
|
Controls the print margins for the printed output. |
The following figure shows the Print Document dialog:
 Accessibility: From the Print Document Menu option in the File menu.
|
Component |
Description |
|
|
Tabs |
||
|
|
The General tab contains general settings for printing including magnification, coloring and document margins. |
|
|
|
The Header tab allows the user to configure the header that will be printed at the top of each page of the document. |
|
|
|
The Footer tab allows the user to configure the footer that will be printed at the bottom of each page of the document. |
|
|
|
The Border tab allows the user to configure the border that is printed around the outside of the document. |
|
|
|
The Margins tab allows the user to configure the page margins used when printing the current document |
|
|
Control |
||
|
|
Activates the standard Windows print dialog that allows the user to select the pages to be printed and the output printer. |
|
|
|
Activates the standard Windows printer settings dialog allowing the user to configure the default printer. |
|
|
|
Cancels the print operation and returns to the application. |
|


